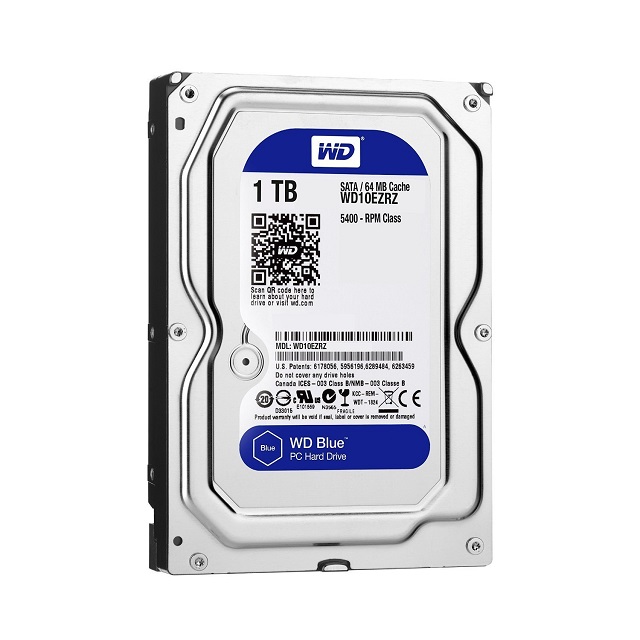
The hard disk drive are fixed disk. With the help of magnetic storage and magnetic rotating platters, this Electro-Mechanical data storage device stores and retrieves the data. Sometimes, you can see that it is missing from the PC. But it may be in Disk Management. Some times, you can see that windows cannot recognize internal, external, and new hard drives. For these errors, there are several solutions. In this article, we have given multiple processes that you can follow to get rid of hard drive not showing up problem. Let’s check them out one by one.
Why is My Hard Drive Not Showing Up in Windows
Due to connection problems, corrupted drive file system, outdated driver, damaged HDD, this kind of error may happen. That too both new and old hard drives are not showing up in windows.
The ways to fix the hard drive not showing up problems are as follows:-
Fix (Old/New) Hard Drive Not Showing Up in Windows 10
Method 1. Fixing Problematic Hard Drive Connection – Changing the Disk Connection
You can use this method when you don’t find the new hard drive in disk management or file explorer. A problematic cable or loose connection can cause connection problems. Follow the steps to solve the problem.
Step 1: Firstly, your job is to check those cables that you are using to connect. In case you find the cable(power or SATA) broken, then use a new one.
Step 2: Use a SATA cable for unplugging and replugging in the hard drive. You can also check the power cable also in this case.
Step 3: At last, you have to restart the PC. Then, check the hard drive whether it is shown or not.
Method 2. Fixing RAW, Unsupported or Corrupted File System – Formatting Hard Drive to NTFS
If it is displaying as “*Others” or Raw, ensure that you have a corrupted hard drive. You have to format it to a supported file system. Here, we have given the procedure of formatting.
Step 1: In Windows 10 or 8, you have to press Windows + X keys. Now, you need to tap on the “Disk Management” option. If you have Windows 7, then hit the right mouse button on the ‘Start’ icon. After that, you have to select the option “Search.” Now, you need to type disk management and then tap on it.
Step 2: Next, search for the hard drive. After finding it, you have to hit the right button on it. Then, your job is to choose the “Format” option.
Step 3: At last, name the file as NTFS. Then, tick on the option, “Perform a quick format.” Now, tap on the “OK” option to begin the formatting process.
Method 3. Fixing UnAllocated Hard Drive – Restoring Data and Creating New Partition
Follow this fixing method when you find your hard drive as unallocated or unknown.
Due to Accidental deletion, virus attack, etc., you can find partition loss. Recovering data from that unallocated space can help you in this case. After recovering data, you can make a new volume(s) on the disk. It will help to show up the hard drive. The process to restore data is as follows:-
Recovering Data from Unallocated Hard Drive
You can take the help of the professional hard drive recovery software also. It helps you to mark the unallocated place as a lost partition. Thus, you can choose the portion directly and scan it.
Step 1. Selecting and Scanning the Hard Drive.
In this case, you have to go to the data recovery software. Then find that drive on the software.
After selecting it, tap on the “Scan” option. Then, wait for a minute until the scanning method is finished. Thus, you can get all the lost data.
Step 2. Finding and Pre-viewing those files that are located on the selected drive.
You need to go to the “Deleted Files” and “Lost Files” option and check them. However, you can use the “Filter” option also. Next, you have to click on the “Search” option and then look for your lost files. Suppose you want to open the files, double-click on it. And then, check the files.
Step 3. Recovering and saving the lost data
You need to find now the lost hard drive files. To do that, tap on the “Recover” option. After that, your job is to browse secure locations for saving them. Now, you have to hit the “OK” option. Thus, you can complete the recovery method. Before making it showing up, make sure that you have saved the found files to another place.
Creating a New Partition in terms of Making the Hard Drive visible
Make a new partition after retrieving all your valuable files. Thus, you can show up the hard disk and use it again.
Step 1: First, you have to hit the right button on the “This PC” option. Then, you need to select the “Manage” option. After that, tap on the “Disk Management.”
Step 2: Next, click the right button on the unallocated space of the drive. Then, your job is to select the “New Simple Volume…” option.
Step 3: Now, you have to tap on the “Next” option to continue.
Step 4: After that, your job is to adjust the volume size. Then, you can assign any drive letter to the volume. Now, tap on the “Next” option and name it NTFS.
Step 5: At last, your job is to tap on the “Finish” option. Do it when the Disk Management displays a new volume on the hard drive.
What to do if the hard drive not showing up in bios-
Here, we let you know what to do if the hard disk is not detected in BIOS and how you can gain access to the saved data again.
Reconnecting Hard Drive to the PC
How to reconnect your drive to the PC. To do so, you should ensure whether the hard disk cable is faulty or not. And due to faulty cable some times hard drive not showing up on the PC. It also happens if you don’t plug the hard disk into the computer. In this case, you can reconnect your drive to the motherboard USB port of your computer.
Step 1: First of all, what you need to do is to close the PC.
Step 2: Now, you have to open the cases. Then, use a screwdriver to unscrew all screws.
Step 3: Next, your job is to unplug the drive. Then, you should discard both SATA and power cable. In case they are not good, then replace them with a new one. Now, remove the dirt from the cables.
Step 4: After discarding the hard drive, remove all the dust. Then, you have to insert the drive into your computer case.
Step 5: Then, you need to connect the drive to the computer motherboard again. In this case, you can take the help of the SATA or ATA cable. Now, you can plug in the power cable on your drive. You must not forget to connect your drive back to the computer. After doing that, you need to fasten those cables.
Step 6: Now, restart the PC after fastening them properly. At last, check whether you find your hard drive showing up on the PC or not.
In case you can access the data, ensure that you have completed the process successfully.
Why is BIOS Unable to Detect Internal Hard Drives?
A few reasons are there due to which BIOS is unable to detect the internal hard drive. In this case, you need first to make sure that you enable the ATA or SATA port. In addition, still you see that internal hard drive not showing up, follow these steps to troubleshoot it.
Drive not enabled in the BIOS
When you power on the system, usually PC shows a brief message. We know the System Setup as the “system BIOS.” People call it the “CMOS Setup” also. For instance, you can see “F2=Setup” in Dell models. When you boot-up the PC, you can see it in the upper right-hand corner. It indicates that you need to press the F2 key to enter the BIOS. The setup process depends on computer manufacturers. So, it is better to check the system documentation first.
However, sometimes the drive remains powered off in the system setup. Due to this, the bios is unable to recognize it at that time. A few motherboard manufacturers don’t allow the use of unused ports. That’s why you should enter the BIOS setup to check the recent position. If you include a second one, you may also need to power on it in the system setup.
The Serial ATA motherboard drivers are not loaded accurately:
Usually, we install the older windows versions known as the boot drive. But while installing it, the drive is not recognized. In this case, you may require to update your driver.
Faulty or Unplugged Data Cable
You need to check your hard disk as well as the motherboard connections. Check whether these are misaligned or bent. Make sure that you must not use the folded or crimped data cables. It can lead to break the cables in the insulation. People who use SATA cables should use those that are shorter than one meter.
The Drive is not Spinning Up.
If the drive is unable to receive power, then it won’t spin. To check whether it is creating the problem or not, follow the steps.
First, you have to switch off your PC.
Then, open the cases of the computer. After opening that, your job is to discard the data cable from the drive. As soon as you remove it, the drive will stop sending any power saving commands.
Then, you have to power on your system. Now, check whether your drive is spinning up or not. If it is spinning, you can feel a slight vibration while touching. In case you don’t feel anything, then make sure that it won’t start.
In case you are unable to determine whether it is spinning or not, then you need to follow these steps:
You should boot your Computer first. Then, listen if any sound is coming from there or not.
Now, close your computer.
After that, you have to remove the power cord from your computer.
Next, your job is to remove the power cable from the hard drive.
Now, you need to connect the power cord again to your computer.
Then, check whether you can hear the sound or not. To do this, you need to boot up your PC. Do this method of booting up again to reconnect the drive. Now, wait for hearing the spinning sound.
You can use a CD-ROM or DVD-ROM drive.
Now, make sure that you have a sufficient power supply on your PC. Check if the power supply can operate your devices.
If you fail in this method, too, try to connect it with another PC.
At last, you need to connect your drive with a SATA-USB.
Incorrect Jumper Settings on the Drive
The jumper you will need depends on the configuration of your system. If the system’s configuration has been done before October 1998, it won’t support UDMA 66 or greater versions. In this case, you need to use the Master/Slave jumper settings. Always choose the jumper settings while you are using the cables on the ATA drive. Devices that are connected with UDMA cable take the help of the Cable Select setting. When you use this setting, the cable will help to detect the master/slave device.
Faulty Hard Drive
In case all these steps don’t work, or you face this problem: Internal hard drive not showing up windows 7, follow this method:
First, you have to clean your drive in the command prompt. Use ‘diskpart’ in this case. When BIOS detects your drive, use the “clean” command to format. It helps to set your file as an NTFS file. But while doing this method, you may lose your documents that are saved on the Drive.
Then, you need to insert the Windows 7 bootable disc. You can insert a USB also. Now, reboot the PC.
Next, your job is to press the F12 button. It will help you to get the boot device options. Now, select DVD/RW.
After that, you can see a page appearing on the screen. Now you need to hit any button to boot up the setup of Windows 7.
Now, hit both shift and F10 buttons at a time. Press these when you see the welcome screen appearing. As soon as you press it, it will show you a command prompt.
Here, you need to type “diskpart” without quotes. Then, you need to hit the enter button.
Now, type “list disk.” Hit the Enter button again.
When you see your drive here, write “select disk X.” Next, you have to hit the Enter key.
After that, write “clean.” Then, you need to hit the Enter key. Thus, you can see a blank MBR on the screen.
You don’t need to install Windows 7.
However, you can eliminate the HDD and save that one to another PC. Then, you can format your drive with the help of an NTFS file system. As soon as you finish the method, start installing windows 7.
What to Do When an External Hard Drive not Showing Up on Mac
Ensure that you plug in the drive correctly. It depends mainly on the type of wire. Always try to choose the right cable. Now, you need to connect these properly.
Faulty cable maybe the reason for this problem. In this case, you need to connect a similar device using a different cable.
A damaged USB or flash drive port can cause the issue. If you have any other port, use that one to connect it.
You can reboot the Mac. In case you find the USB disk is unable to boot, then the problem is in macOS. You can solve the problem by restarting it.
To do this, you need to go to the Apple menu first.
Then, you have to click on the restart option. However, you can press the power button and hold it for a while.
Next, you can see a dialog box. You have to tap on the Restart option. You can press the R button to restart also.
When you restart the Mac, it will clear all the macOS’s memory.
If you don’t format the drive correctly, even then, the problem can arise. Each external drive is not optimized for Macs. However, if you have any PC or laptop, you can try it to connect. You can also try to check whether you can access your documents from other devices. The best thing you can do in this case is to go to Apple menu. Then, go to the option named About This Mac. After that, you need to go to the Storage option. Now, check if you see the external drive. If you want to get more details, then return to the same menu. After that, you can select the System Report.
Resetting NVRAM
You can reset the NVRAM also. In this case, you need to close the Mac or restart it. Then, you need to switch back to the Mac. After doing that, you need to press four keys at a time. Hold these keys— Option, Command, P, and R— for twenty seconds. As soon as you find the Mac is starting again, release those keys. Now You can now expect to see your hard drive.
In addition, You can go to Apple’s Disk Utility and see whether it shows any external drive or not. Moreover, You can get it within System Preferences. Besides, you can take the help of the spotlight to find it. In case you see it, then tap on the option to mount. You can see it in the External Drives and on the Desktop.
In case any of these options work, then make sure that it has been crashed completely.
External Hard Drive not Showing in Disk Management. What to do?
Here, we have given the easiest solution that you can follow when the external hard drive not showing up in disk management. Follow these steps to get the results.
Step 1: The first job you need to do is to connect the external hard drive. Then, plug it in the USB cable. In case it is not showing up in the disk management, remove it then.
Step 2: Then, what you have to do is to initialize it. To do this, first.
Navigating to the menu ‘start,’ you need to press the right button on the “Disk Management.” Next, your job is to look for the external hard disk( shown as unknown). Now, you have to right click on it. And then, select the Initialize Disk.
Lastly, choose the partition style that you prefer for your disk – MBR or GPT. Tap on the OK option to finish the process.
Reasons Why the Hard Drive is not Showing Up in Windows
Plenty of reasons are there due to which windows can’t recognize your drive. The possible causes are as follows:
Sometimes, the hard disk doesn’t have any partitions. And due to this, most of the space in the disk is unallocated. If it happens, then you can’t see it in Windows Explorer.
If the partition doesn’t have any Drive letter, then it won’t show in File Explorer. Assigning a Drive letter can solve this issue.
You can’t see it if you find a disk in Disk Management as “Unknown, Not initialized.”
If the driver is outdated, then your PC can not recognize it. You need to check whether the driver is compatible with the operating system or not.
BIOS can’t detect the hard drive even when the disk is not enabled.
The hard drive bad sectors are usually unable to both read and write requests. Your system can never detect a disk that has too many bad sectors.
How to Fix Drive That Won’t Show Up in Windows:
First of all, you should know for which reasons the problem occurs. There could be plenty of reasons:
- Using the incorrect system file
- Having a problem with the driver on windows
- Corrupted USB outlets
- Corrupted Hard-Drives
Make sure that the Drive comes on.
The process is very easy. Firstly, You need to just Plug in your Drive. Then, you have to check whether it powers on or not. In case it doesn’t power on, then the problem is in the Hard-Drive cable. In this case, you can use another cord. Besides, you can plug this into other systems also. If you find that your drive is not showing up, ensure that the cable creates the problem.
Using Disk Management in terms of Checking The Drive
In this case, you need to make a connection between the hard-drive and the PC. After that, go to Disk Management and open it. You can do it by pressing the Windows Key and X buttons at a time. Next, you have to choose disk management from the available list.
The tool enables you to see the drives connected with the PC. It helps to review sizes, check statistics and partitions, etc. Even you can see the hard-drive also in the Disk Management window. If you don’t find it in the window, then it should not have partitions. If the drive comes here, you will be able to make another volume and assign a drive letter. Thus, you can get the drive back. But in case your PC is still unable to detect the external hard drive, then follow another way. In this case, you need to know why your hard drive not showing up.
Using an Alternative Windows PC
You can attach your external hard-drive with another USB port also. In case it comes up, then the bad USB port causes the issue. Use any other PC if the drive is not still showing up on the Disk Management. If this trick also fails, then move to the next step.
Creating a Partition and Format
You can partition the hard disk drive to show up. The disk management tool can help you in this case. But in case the drive has an issue regarding the partition loss, then make a new partition. It enables you to recover the lost data. In this case, you need to make a recovery of the lost partition.
Getting back the partition that is lost or removed
You can’t restore a removed or lost partition using disk management. However, you can get the space back using the software. It allows you for partition recovery. You can use the Data Recovery software for Windows in this case. Using it, you can restore the partition. Thus, you can recover all the files and folders that you have lost. Follow the process to recover the data using the Data Recovery software.
First of all, you need to go to the website to download it.
Next, make sure that you have picked the latest version. If you don’t select the latest version, some times your PC can’t detect the external hard disk drive.
You need to ensure that you have attached the drive to the PC properly. Then, you need to open up the Data Recovery software.
You can see the connected drives as soon as you launch it.
Now, find any hard disk drive in which you will store the recovery data. Then, you have to choose the option “Recover. ”
Data Recovery software helps you in this case by making a fast scan. It helps to scan deleted files, corrupted images, hidden data, etc.
After doing a quick scan, you can see all the revered files appearing on the screen. Now, you can place them in any secure location on the Hard Drive. At last, close the application. But before closing it, you need to save both files and folders that you are willing to recover.
Troubleshoot Devices and Hardware
If you are using Windows 7 and the above devices, you can use the hardware troubleshooter tools. It helps you to find error in the devices when the flash drive is not showing up. Here, we have given the procedure that lets you know how to use this tool.
First of all, you need to go to the Start Menu. After that, you need to tap on the Control Panel option. As soon as you do it, a Control Panel window will be opened. Next, tap on the Troubleshooting icon available on the left side.
Now, you can see a window appearing on the screen. Then, you need to find the “Hardware and Sound” option. It is available on the right side.
After that, you have to tap on the “Hardware and Devices.” Then, you need to click on the “Next” button.
At last, a new window will appear to analyze the problem. Then use the wizard to end the method.
Formatting the Hard Drive
It is the last way that you can follow if all these ways fail. PC can not detect the HDD, if it is not in FAT32 or NTFS format. Just use the Disk Management Utility to choose the format that you prefer. After that, you need to launch it. You need to the right click on it and select the format.
Initializing new disks
Sometimes, you need to add a new disk to the PC, but it is unavailable in File explorer. If it happens, then you must need to assign Drive letter. You can initialize it also before using it. In this case, you need to initialize only the Drive. When you initialize a disk, all the data on it will be erased. Thus, you will get a new disk that you can use in windows. Then, you can use it to format and store all your essential files in it. But you must not initialize the disk if you have essential files on it. In case you do so, you can lose all your documents. We have given here the method to let you know about the procedure of initializing a new disk.
Disk Management
First of all, your job is to go to Disk Management. Then, open it taking permission from the administrator.
To get permission, write Disk Management in the search box. You can get the search box on the taskbar. Then, select the Disk Management option and hold it for a while. You can click on the right button also. After that, you need to choose the Run option as administrator. Then, click on the Yes option. However, it can’t open it as an administrator; then you need to type Computer Management. Next, open the Storage option. Then, click on Disk Management.
Now, you need to tap on the disk which you are going to initialize. You can get the disk option in Disk Management. After that, tap on the Initialize Disk option. Sometimes, you can find that the disk is listed as offline. If it happens, then right-click on it. Next, choose the Online option. A few USB drivers are there that you can’t Initialize. What you can do is formatting only.
Then, go to the Initialize Disk dialog box. Open the box and check it properly to ensure that you have chosen the right one. After that, tap on the OK option to use the partition style and make it default. Sometimes, you may require to change the partition style. If you want to do that, follow the guide of About partition style – GPT and MBR.
About partition styles – GPT and MBR
You can categorize disks into many chunks that we know as partitions. Each partition has any of these partition styles —GPT or MBR. However, nowadays you don’t need to worry about the styles. It is because windows can use the right one automatically. Usually, people use a GUID Partition Table (GPT) disk for their SSDs and hard drives. Compared to others, GPT is very powerful. Users having 32-bit PCs or older versions of PCs can go for the older Master Boot Record (MBR) disks. If you have a removable drive like a memory card, then you can use it. However, if you want to convert an MBR disk to GPT, or vice versa, then erase all the volumes from the disk.
How to recover data if the disk is not displayed in My Computer
First of all, your job is thinking about where you can store your recovered data. You can use an external drive or a thumb drive as a storage place.
Then, you need to download and install the software.
Next, select the device where you want to store the data. Then, tap on the Start option.
You need to wait till the scanning process of the software is not finished.
Now, your job is to remove the recovery quality. You can take the help of the Pre-view function.
At last, you have to buy the license key. Then, copy all the data.
How to make the device visible in Windows
When you recover data from the device or see that you can open the files, then start to fix the device. You have to format your file to make it visible. First, go to the Partition option and tap on the Format option. It is available in disk management. Usually, two types of formatting styles are there— quick and complete. The quick format is effective against only the partition table. On the other hand, you can use the complete format to reach each sector. Most of the time, people use the quick format to fix most of the file system issues.
Frequently Asked Questions
-
How to get my computer to recognize a new hard drive?
First of all, your job is to go to the Search option. Then, type the device manager on it. After that, press the enter button. Now, you need to expand the disk drives to find the new one. After finding it, you need to click the right button on it. Then, open the Update driver software. In case you find any update, then you can follow further instructions.
-
Why is my hard drive not showing up in disk management?
Due to connection issues, a driver issue, or faulty BIOS settings, you can find hard drives are not showing up in disk management. However, you can fix these issues. Connection issues mean you have a faulty cable or USB port. On the other hand, Incorrect BIOS settings mean it is not showing the new hard drive. Due to these reasons, it may happen that HDD not showing up in disk management.
-
How do I fix hard drives that are not detected?
Step 1: First of all, what you need to do is to close your computer. Then, you need to remove the cases from them. In this case, you can take the help of an ATA/SATA cable and power cable.
Step 2: After that, you have to open your new PC.
Step 3: Now, you have to find the drive slot. Then, you have to insert it into the slot.
Step 4: Now, you need to reconnect your hard disk drive with the help of ATA/SATA and power cable. Use it as the second HDD on your PC.
Step 5: At last, what you have to do is to restart your PC or laptop. Then, check whether it is showing up or not.
-
Why is my hard drive not showing up?
Sometimes, the drive won’t appear in the file explorer even when it is powered on. In this case, your job is to go to the Start menu first and then open it. Next, press the enter button after writing “disk management,.” You have to press the Enter button when you see the Create and Format Hard Disk Partitions. If Disk Management is loaded, scroll down it. Then, check if your disk is available there or not.
-
Why is my HDD not being detected?
You may have a faulty connection on the drive or motherboard. Besides, if you are using any damaged data cable, the system won’t recognize it. Then, you can try a new cable. If the issue exists, then the cable is not creating the problem.
-
What do I do if my hard drive is not detected on my computer?
First of all, you need to make sure that your hard drive is powered on in the system. Sometimes, it is not in active mode on the PC, BIOS, or CMOS. Usually, you can get the system set up in most computers by pressing F2. It comes with a normal On / Off setting. You only need to turn it on if your PC is unable to recognize the drive. However, you can use different methods for entering the setup. But it depends on the setup of the computer. That’s why it is better to check the manufacturer setup first.
-
Why is my external hard drive not showing up on my computer?
If you have a broken USB, it can be a reason for not showing up on the PC. To get rid of this problem, you can use another USB port. Or you can connect it with another PC also. Besides, the lack of a proper power supply also causes the issue.