Are you going to install shelving or hang a mirror? Then, you should first find out the location of the studs behind the drywall. If you attach any heavy item to drywall, it can lead to the item crashing. You need to know that the drywall is not so powerful for holding considerable weight. Therefore, if you want to hang big things, you should first drive nails or screws into the studs, which can run up and down behind your drywall. A few methods are there to locate wall studs, but those are not foolproof. A stud finder is perfect in this case as it is very much reliable and works very quickly.
You should use a good model to differentiate between a successful DIY home project and a disaster. While you will hammer or screw things into walls, ceilings, and floors, you must know what is on the backside of the drywall. You don’t want your TV to get crashed, but it can happen if you don’t attach it properly into a wall stud. It is the reason why you need to use this product.
In this article, we have given elaborated details about these finders and discussed the top five best models available in the market.
What is a Stud finder?
A stud is a supporting structure behind the wall. A stud finder is a simple to operate, handheld device used with wood buildings to locate framing studs located behind the final walling surface, usually drywall. It uses an electronic sensor or magnet to find the support structure behind a wall.
A stud finder is known as a stud detector or stud sensor also. People use this handheld device with wood buildings to find out framing studs if there are any behind the final walling surface (drywall). Generally, there are plenty of various detectors available in the market, but most fall into two main categories: magnetic and electric stud detectors. A few devices are also available that are employing radar.
Purpose of use:
The primary work for this detector is to find out the location where studs and joists are available inside the walls using either electronic sensors or magnets. All detectors can detect wood, whereas a few can detect metal, and some of them can detect live electrical wiring. A few models have basic detection capabilities that are perfect for walls, and you can use the other ones on floors and ceilings. Using the best one can help you adjust the depth where the detectors penetrate the wall.
Types:
You can categorize the detectors into two basic categories— magnetic or electronic— that rely on the method you will use. Every type of sensor comes with different benefits that are suitable for different situations. Here, we have given details about these two types of detectors. Let’s have a look at them.
Magnetic Stud Finders:
These are powerful rare earth magnets that allow you to detect where the metal screws or nails holding the drywall panels are. As soon as you apply this type of detector over a wall, it attracts the specific spot where a nail or screw is. While using, you feel like you are pulling the item in the direction, whereas sometimes it gets stuck. In most cases, the magnetic stud sensors weigh light and come with strong magnets that hold items through the drywall.
You can use them to a depth of about 3/4-inch, which is sufficient to find studs behind standard 1/2-inch or 6/8-inch drywall. While finding out a nail or screw, you will also locate a stud. The drywall fasteners are available generally 12 to 16 inches apart. That’s why you should move a magnetic detector over your wall in a sweeping “S” motion so that you can detect them more quickly.
Pros:
- These sensors are very much budget-friendly.
- You can use them as wood stud detectors while you find out their metal fasteners.
- No batteries are required for working.
- These come in a small size that allows you to carry them easily in a shirt pocket.
Cons:
- These sensors usually detect metal instead of the stud because of which they can detect any type of metal like a metal lathe. It is useful for securing plaster or a nail in a horizontal cross-board rather than a vertical stud.
Electronic Stud Finders:
On the flip side, the electronic models depend on internal sensors instead of magnets to pinpoint the location of wood studs. You must use them as these can detect if there is any change in density in the space behind the wall. The best models are pre-calibrated, where you can use them after getting them out of the package and inserting batteries. However, a few models are there that you have to calibrate to ensure precise results.
This technology may seem complicated, but these tools are simple to use. You only need to keep the item flat against the wall, and then your task is to move it gradually in a horizontal way. When the sensor detects an item, it emits an audible alarm and creates a visual indicator, but this feature relies on the specific model.
Pros:
- These are more helpful when you are going to find out studs compared to the magnetic ones.
- An LED screen or indicator light is available, which can pinpoint the edges and the exact center.
- Using the top-quality electrolyte models allows you to detect studs even if these are placed more profoundly in the wall. But a magnet can merely detect up to 1-1/2 inches.
Cons:
- Compared to the magnetic ones, these cost higher.
- You need to use batteries in this case. If the battery gets exhausted and you don’t have an extra battery, you should use a non-functioning tool while necessary.
However, a few other types of devices using which you can detect objects beneath the surface of a wall. These wall scanners are radar-like tools that professionals use only for checking if there is anything behind the wall.
Users can take help from this evolution of technology to locate stud finding apps for iPhone and Android mobile users. You need to use your device’s magnetometer, i.e., the sensor that helps drive the campus and detect metal nails or screws behind your drywall.
The nails or screws are available in the middle of that stud that you are going to locate. You should know that you can’t detect the original wood studs or measure wall density using the apps. However, users are still using a knuckle or hammer every day.
How Does A Stud Detector Work?
Three various types of sensors are available in the market.
- Low-end sensors generally use magnets or electricity for detecting. As soon as these devices detect the fasteners in the drywall and the magnet attracts the metal fastener, it notifies you by giving an alert.
- Detectors which use electricity are capable of detecting changes in the dielectric constant of the wall.
- Modern models generally take the help of radar technology for locating studs, pipes, and wires. These are very accurate but quite expensive.
These are practically foolproof, and you can use them easily compared to the old-school stud-finding methods. It can be helpful while you use them in minor situations. If necessary, go through the methods that we have given below to let you know how you need to use the detector.
How to Use a Stud Finder:
For any homeowner, it is vital to know how they should use a detector model. If you want to use it for a wide variety of DIY projects, then you must find this valuable.
Magnetic models usually help to read screws and nails behind the wall.
However, if you want to know whether these are dead-center or not, you still need to guess. If the project on which you are working is valuable, then your task is to use a center-finding, density-reading model that helps display the edges of your studs.
It doesn’t matter which type of detector you will buy from the home improvement store, because the method to use them is the same for all. It is the information merely that is displayed differently.
Step 1: Detect The Hanging Location:
First, you need to make a decision where you are willing to hang your item. You need to know the right place where the top should be present and how far you have to mount. Ensure that you remove all the nearby wall-mounted photos available nearby or any other partly-metal objects that can interfere with readings on a magnetic sensor.
Step 2: Ensure That Your Detector Is Powered Up:
While using, you have to make sure that the batteries in the device are fresh and functioning correctly, as you can get readings using weak batteries. You also have to ensure that the flat side of the tool is neat & clean, and there shouldn’t be any dust. It is the place where you can see the contacts, so you need to clean the place.
Step 3: Find Out The Stud:
Generally, the studs are 16 inches apart, but these can be 24 inches apart in old homes. Therefore, you have to find a stud within a two-foot span. Now, you have to hold the detector flat against the wall about 1 foot left of the location where you will drill.
Activate it to use the tool. Generally, there are buttons mounted on the sides of these tools where you can grip them. Then, your job is to tap on a button for calibrating the tool. As soon as it prevents flashing or beeping, the tool can be used.
Step 4: Move The Detector:
You have to gradually slide the stud sensor to the right and do it horizontally while you keep this unit flat on the wall.
Step 5: Mark The Spot Where You Find Any Stud:
As soon as the detector gives you a notification with a beep or flashing light, you have to check again to confirm where the alert is occurring. However, it will rely on the sensor.
Step 6: Find Dead Center:
Use a pencil for marking the right spot. While you use a center-finding model, it will let you know where the edges of the studs are. Now, your task is to mark every edge to see where the dead center is and do this while you are going to drill or hammer into the stud.
Step 7: Double-Check Your Work:
You should not do this to end the process. Rather than doing this, you need to look for the flanking studs 16 to 24 inches away from the initial mark. Hence, you are required to follow steps 3 through 6.
We know that the tool helps to locate a stud where you will require this, but it can sometimes signal false positives while there causes metal piping or flashing or brackets within the wall. You can ensure that the alert you have got is right by locating the studs on either side of the place where you want to mount any mirror, television, shelf bracket, or hefty thing.
You have to mark the places while searching them and then you have to measure. Although these are 16 or 24 inches apart, then also you can find the center stud. Now, if necessary, you can drill or hammer as required. You have to confirm that you are following these step-by-step guides carefully. People who like the DIY route can find wall studs without dedicated equipment.
What Does It Indicate With Stud Finder Beeps Repeatedly?
You need to recalibrate for a stud detector that is a primary issue of its beeping. Hence, your task is merely to try to restart your pass along the wall so that you can get a better reading. A few detectors are available in the market to detect voltage and alert you of live wires behind your drywall.
How Do You Know Where The Studs Are In The Wall?
Use a density-reading stud sensor as it is an effective way to detect them. Through this process, you can identify both the stud locations and the center of a stud. It is essential while you are going to mount heavy objects on a wall.
Do You Want To Drill Into A Stud?
If you are going to hang a heavy object on your wall, then it is required for you to drill into a wood stud. If you can drill into a stud and use heavy-duty fasteners, it ensures that you can mount the object securely.
Things you should be aware of about your wall: Generally, the distance between two studs is 16-inch, and the next one is available at the same distance in any direction. Usually, you can see the changes in the distance near the ends of walls or doors and windows. The tool you are using detects something between the studs, metal or plastic plumbing components, electrical boxes or wiring, or metal ductwork.
You can use the electric wires on the side of a stud and horizontally between outlets. Whether there are light fixtures, switches, and outlets on your wall, you need to guess to know where the wires should be. Make sure that you know the location of the kitchen and bathrooms. You can find the water supply and waste pipes for the second floor on the first floor, below sinks, tubs, or showers.
Stud-Finding Tips:
When using the tool, you must not touch the device with your hands, altering the readings.
- You have to calibrate a few devices before scanning; that’s why your job is to start away from switches, outlets, or light fixtures.
- Use tape of the painter over the area where you are willing to scan. Thus, you can guess where you have to mark your findings without writing on the wall.
- Always mark studs, objects, or live wires, while you detect them.
- You have to scan the place above and below to detect a stud to ensure it continues to the floor or ceiling. It is because there are other readings also that are for wiring, plumbing, or ductwork.
- You cannot scan freshly painted walls for up to two to three weeks, as there is still moisture in the paint.
Can Stud Detectors Be Wrong?
Sometimes, these can alert you after detecting a pipe, bracket, or any other material. Although many sensors differentiate between these different types of materials, you can get false readings. It is the reason why you need to scan your wall continuously till you locate at least three studs. If you find the distance between them is similar, 16 to 24 inches, make sure you have located studs, not any other building material.
Do These Work Through Ceramic Tile?
Whether you want to install grab bars in the bathroom, but it is tiled completely, you must require this sensor to find out the studs behind the tile. The detectors won’t face any issue while scanning through drywall and similar materials. However, a few users or DIYers are capable of using these through ceramic tile. That’s why you have to use a scanner that takes the help of radar to “look” through the wall. These models are very costly. However, a few deep-sensor stud detectors are available that can penetrate tile with fairly reliable accuracy. So, it is hardly said that you have to use this while fastening something hefty to your tiled wall.
Best Stud Finder:
-
Franklin Sensors ProSensor 710 Precision Stud Finder: Best overall
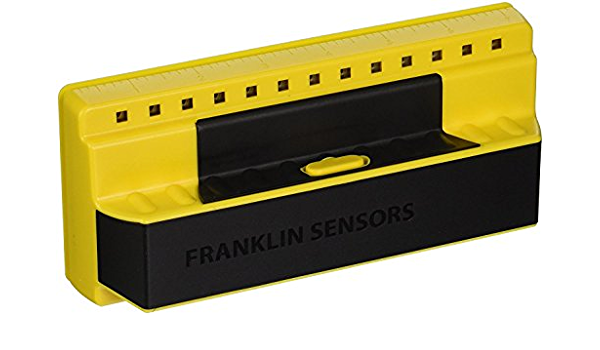 Description: While you use a sensor, make sure that it is accurate. If you don’t trust the tool you are willing to use to stop utter disaster, you don’t need to spend time on it. You should always know what is on the other side of the wall to make a project successful. It is when this electronic model comes into use.
This tool has got the top rank for the authentic and detailed look that the device delivers while you use it. It comes with 13 sensors that can look behind the walls or underneath the floors, identify and mark the location of wooden studs and metal objects.
With the help of this device, you can scan a wide area of the wall while looking for studs. If the tool has an additional width, you will get a more accurate sense of stud location because you move the sensor along the surface. You have to turn on the LED lights on the front and then mark the location and width so that you can understand the starting and ending point of the stud.
Features:
Multi-Sense Technology: The device is equipped with an advanced Multi-Sense technology that helps to detect the wall in multiple locations simultaneously.
LED Lights: It has bright LEDs lights that you can use to illuminate the position of hidden objects. This feature makes the tool very simple for visualizing the position of studs.
Identify The Size Of The Stud: If you can identify the width of hidden objects, you can know both the position of hidden objects and their size. Using the detector, you can locate the position of many studs simultaneously.
Pros:
- LED lights
- Advanced Multi-Sense technology
- Detect the stud size
- 13 sensors to look behind the wall
Cons:
- Unable to detect live wires.
-
BLACK+DECKER BullsEye Line Laser With Stud Sensor BDL190S: Best Multi-Purpose
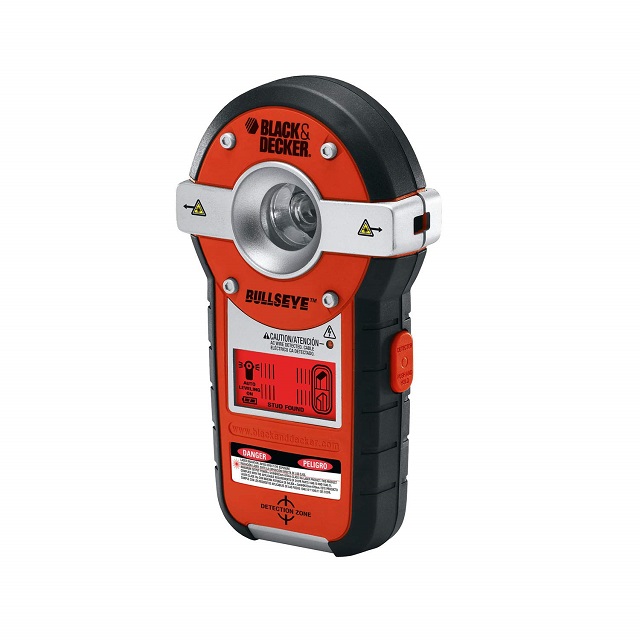 Description: If you want to use two devices in one tool, it is the BLACK+DECKER line with a stud sensor. The device is perfect for you while you are going to hang or mount hefty items. Ensure that you are fastening the heavy items securely to a stud for support like cabinets, mirrors, heavy artwork, televisions, or shelves.
It allows you to locate hidden things inside your wall, such as studs, metal pipes, wooden support beams, live AC wires, etc. You can use the tool on your drywall, lathe, plaster, concrete walls, and many more. Tap the power button and hold it with your thumb or finger until you finish your work. Then, your task is to slide your tool across the wall in your targeted work area. Now, you can get a beeping sound while the device encounters a stud or any other object inside the wall.
As soon as you can locate the stud for anchoring your object securely, you have to switch the tool to the level function. It comes with a small pin available on the device’s backside for anchoring to the wall during your applications. Hence, the sensor releases a red laser line maximum at twenty-foot in both directions horizontally. It contains two AA batteries and comes with a two-year limited warranty.
Features:
Design: It comes with an LCD with an excellent design to read it with ease.
Auto-Leveling Technology: With the help of this technology, you can deliver accurate and beautiful horizontal framing to your work.
Sensors Of High Quality: Using the high-powered sensor, you can detect studs made of wood and metal and live A/C wires.
Pros:
- High-powered sensor
- Two AA batteries
- Auto-leveling technology
- Excellent LCD
Cons:
- Deep scanning is unavailable
-
Zircon MetalliScanner M40: Best for Metals
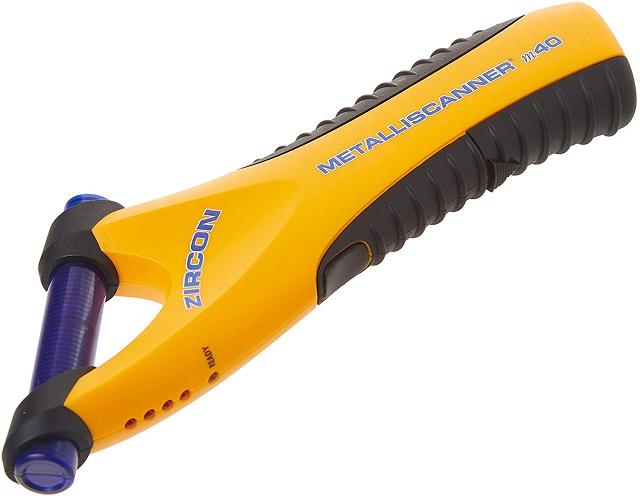 Description: This product can locate ferrous (magnetic) metal and non-ferrous (non-magnetic) metal. Besides, this one can detect metal in wood, drywall, concrete, paneling, tile, plaster, and other non-metallic surfaces. You can use it for plaster walls also. It is helpful to find rebar in concrete, plumbing, ductwork, nails, and screws in walls, floors, and ceilings. The device comes in a custom design that helps detect different types of metal and objects behind floors, walls, and ceilings.
It can detect small things like screws and nails embedded deeply into the wall up to four inches deep. As soon as you move the device, the blue coil will light up to let you know the actual place of any object. Therefore, it becomes easier for you to pinpoint hidden materials behind your drywall.
Features:
Wide Scan: It comes with a comprehensive scan feature that allows you to find the correct location of any metal in walls or concrete. You need to use the Wide Scan position similarly as you will do in the PinPoint Scan position.
Scan Through Plaster: What makes it unique is that it can find studs even in lath and plaster walls which don’t have any metal mesh. The device can scan in both positions— PinPoint Scan and Wide Scan through lath and plaster.
Battery: To use the device, you merely have to use a fully charged 9V battery to power the integrated LCD screen. If you don’t set the battery properly in any electronic device, then it can lose power. Hence, you should install a fresh battery that comes with an extended expiration date. It will resolve 99% of the issues.
Pros:
- 9V battery
- Scans through lath as well as plaster
- Wide scan capability
Cons:
- Unable to detect live wires
-
C.H. Hanson Stud 4 Sure Magnetic Stud Finder: Best Affordable
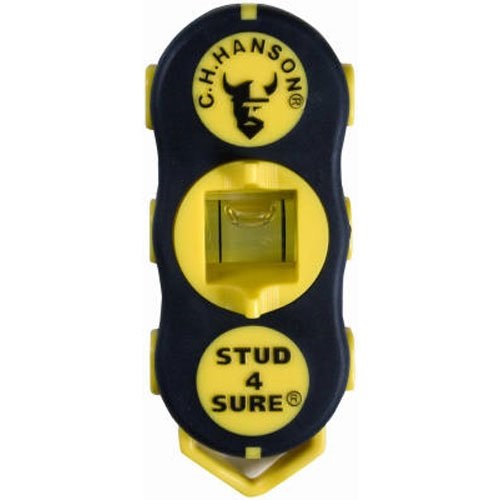 Description: This magnetic sensor is a fancy magnet, but the performance it delivers is perfect for a once-in-a-while improvement project. With the help of this model, you can find out the studs through attraction to metal. Besides, it can attract the screws and nails if these are sunk into a wooden beam. You can spot studs easily using this. If you find the detector sticking to your wall, ensure that a stud is under it. If not, then there will be nothing.
It was the Christian Henry Hanson who founded this in 1866. The first place was Chicago, where Henry started to create hand-cut stencils. This organization has always been remaining true to its past while it also reinvents itself for the future. Henry Hanson has made all things such as license plates, barricade tape, hand tools, marking devices, etc.
Sometimes, wooden studs contain small metal that gets stuck through them. Therefore, if you don’t move the sensor side to side and up & down, it may not detect a framing piece. However, the additional work is justified by the low price tag of the detector.
Features:
Magnetic Sensor: The device comes with strong rare earth magnets to locate metal and wood studs in walls. As it takes the help of magnets for searching, it doesn’t need any battery. It features a rotating level for both vertical and horizontal marking.
Simple To Carry: You can carry it into your pocket easily as it comes in small sizes. Just keep it into the pocket and then use it for remodeling, new construction, and other different types of DIY projects.
Bubble Level: It is equipped with a bubble level that makes the device ideal for tracking the stud’s position behind the wall. Besides, it enables you to mark and measure with ease. But compared to an electric model, it will be less accurate.
Quality Service: The C.H. Hanson Company has been still continuing its commitment to quality serving for construction markets and metalworking. Thus, it holds the top position when it comes to stencils, tags, steel stamps, work holding, and other metalworking machine tools & accessories.
Pros:
- No batteries required
- Includes bubble level
- Budget-friendly
- Portable
Cons:
- Unable to detect some wooden studs
-
Bosch Digital Multi-Scanner GMS120: Best for Floor or Ceiling Joints
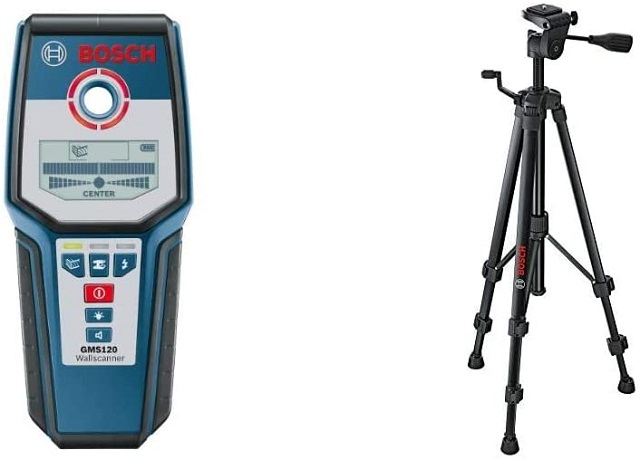 Description: When you do a project that needs drilling or hammering into the surfaces, like hanging a ceiling fan, you must have a good idea about what is behind the floors & ceilings. No one wants that a big chunk of their drywall will crash down onto the floor or the top of their head. It is a multi-scanning model that is capable of holding items even in awkward positions. Therefore, the overhead work becomes more accessible and safer.
It comes with an ergonomic design that can detect metals and live AC wiring at the same time. When you are going to scan your floor, this model is the best choice. The tool offers a deep 4.75-inch scan depth and can handle materials as dense as cured concrete. The device features an LCD and audible detection signals that provide a lot of feedback to find objects underneath the floor surface.
Features:
Multi-Mode Laser: This detector comes with a multi-mode laser detection technology to identify wood studs, live wires, and metal objects such as rebar, studs, and steel/copper pipes.
Laser Technology: It comes with the latest three-sensor laser technology capable of detecting up to 1 1/2 inches for wood studs, up to 3 1/8 inches for copper, up to 2 inches for live wiring, and up to 4 3/4 inches deep in cured concrete. This tool comes with an accuracy of 0.0625.
Self-Calibrating: The product comes with three selection modes for wood, metal, and AC wiring. The device provides automatic calibration from the start, and then it continues self-calibrating throughout the entire project for accurate detection.
LCD Display: It comes with an illuminated graphical LCD that helps to indicate mode, detection strength, etc. When the tool doesn’t find any item, the green light is highlighted in the large detection ring, whereas orange light is when the object is near and red light will be highlighted when an object is present within the sensor range.
Center Finder: It has a center finder that can identify the object’s center point using an audible detection signal with the help of a Power on/off button.
Pros:
- Multi-mode laser detection technology
- Detects AC live wires
- LCD is available
- Three sensor mode
- Three selection mode
Cons:
- Costly
Best Stud Finder Buying Guide:
Number of Sensors:
The electronic sensors have been improving for many years since it’s appearance in the construction market in the 1990s. These use sensors to detect if there is any mass behind your wall. Few of them come with a single sensor, while some have multiple sensors. Single ones can merely detect the stud edge, whereas devices with multiple sensors can detect both edges and the stud center. You can use them as, on average, each of these is suitable.
Sensor Size:
Those with large sensors come with some benefits like these can cover a more expansive area and penetrate thicker walls like plaster or concrete. On the flip side, smaller ones have high accuracy. However, the size does not matter for the home DIYers as you can pinpoint stud using a normal device having smaller or larger sensors.
Depth Adjustment:
This feature is suitable for electronic models merely. With the help of this feature, you can detect objects up to 1-1/2 inches beneath the surface if there is any. You can use the tool for detecting even more behind the surface, which helps detect floor joists where coverings like wood, tile, or carpet are present.
But obviously, you never want to run this tool at this level consistently. Increasing the depth adjustment will consume more energy and finish the battery power fast when you increase the device. Therefore, you should switch it back & forth and turn on the stud-finding mode. Thus, you can conserve battery life.
Alternate Materials:
Apart from wood, other types of materials can be present behind the walls, such as plastic or metal pipes and AC wiring. In recent times, modern devices have modes that can detect materials. This will help you when you are searching for a stud for supporting a heavy mirror or shelf.
Built-In Bubble Level:
This feature helps level shelves or anything else you will attach to the wall. A few small-sized bubble levels have less accuracy compared to longer, carpenter-type levels. It is because these can record levels merely over a very short distance.
Built-In Laser:
This feature is merely available in electronic models. You only need to hit a button, and then you can shine a laser in a straight line from the stud’s location. The laser will help you align extra fasteners. Using a laser level, you can hang many photos or paintings on your wall to a snap made by the laser level.
Display:
The visual display is available in different types to know how you are willing to “see” the stud. A few electronic stud detectors are available that preview a digital map of the stud on the screen. On the other hand, a few models are there that come with LED lights across the top. The light will blink while you pass the tool over a stud.
Battery Indicator:
It will let you know while you need to change the batteries. The electronic models only have indicators. Some electronic models come with AA or AAA alkaline batteries, whereas some use small 9-volt batteries for different power options.
Conclusion:
You can ensure that these tools will deliver definitive results. Just use these tools along with electrical and plumbing fixtures to detect things behind your drywall. We hope that you will find the article best.
Frequently Asked Questions:
- Can you use an iPhone as a stud finder?
When the magnetometer of your iPhone is near any metal, then it will beep. An app named Stud Find uses the built-in magnetometer for searching metal studs, screws, nails, and any other metallic thing in a wall.
- Can you use your mobile as a wood stud finder?
Both iOS and Android users can use the Stud finder app for pinpointing metal studs, nails, etc.
- Are cheap stud sensors accurate?
According to experiments, most of them are reliable as well as accurate. These tools are capable of detecting steel fasteners, live wires, pipes, etc. A few models can identify double-stud construction.
- Why are stud finders so unreliable?
Generally, the magnet-type detectors are not capable of working effectively as these rely on locating the fasteners. It may be challenging for you to find.
- What does the lightning bolt indicate on a stud finder?
The tool comes with a WireWarning® detection feature that alerts you when it will find any live, unshielded electrical AC wires during scanning. If any live AC voltage exists, the LED light will flash, or you will see a lightning bolt icon on the LCD, but it relies on the type of model.