Your Gameplay recording is generally done for two things. The first is to capture the moment for posterity and bragging rights (if you have made a great in-game play, usually on PVP). The second is to post them on a video-sharing site for others to watch and follow. This entails Youtube and other platforms like Twitch and Mixer for streaming. Via third-party applications and Google Play, most phones even record their Gameplay.
Whether it’s Xbox One, Windows 10, or PlayStation 4, all of them have integrated ways for you to record your games and share videos online. Meanwhile, Android phones, iOS smartphones, and iPads are now acquiring built-in ways to record and share smartphone gaming videos on YouTube, Twitch, or somewhere else.
The solutions we will be mentioning below not only allow you to record your Gameplay, but they also let you capture your voice with your microphone and, in the case of Android, with the front-facing camera, capture your face. It is not just a gaming video itself.
There are several techniques used to achieve this, and if you have the know-how, they are easy to set up. But we’ve made a step-by-step guide to support you, which reveals how to record Gameplay on Android, iOS, and Windows 10.
How to Record Gameplay on Android
Google updated Google Play back in October of 2015. The upgrade allowed players to record and edit and post Gameplay in their games. This came out as streaming on the internet was beginning to become popular. Here’s how to record Gameplay on
Note: To use this feature, you will need Google Play Games’ latest version plus an Android Lollipop OS.
Install and open the Google Play Games
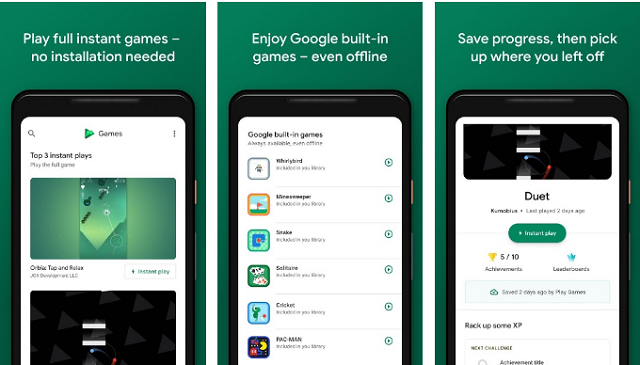 Beautifully self-explanatory. The app is available on the Google Play Store for download. Before doing this, make sure it’s upgraded to the latest version if you do have the app.
Tap on the “Record Gameplay” option and choose your video’s resolution
Here’s where the fun continues. When recording, you will select which of the two resolutions you want to have. 420P (Standard) and 720P (HD) are the options.
Play the game you want to record and start recording your Gameplay
Play the game you want on your phone after doing this. Then you’ll see a snapshot of yourself in the corner of the screen of your phone. Click it and the red record button will appear. To begin recording, you have to click it. You can also transfer the image to any portion of your phone’s screen, such as bubbles from the Messenger app.
Since it is already on Google Play Games, where you won’t need to add anything else, this is one of the simplest ways of recording Gameplay. But in the Play Store, there are various other apps that you can install if you want. We will address one such app and mention other related apps that you can install and start recording your Gameplay with.
Record games through AZ Screen Recorder (Android)
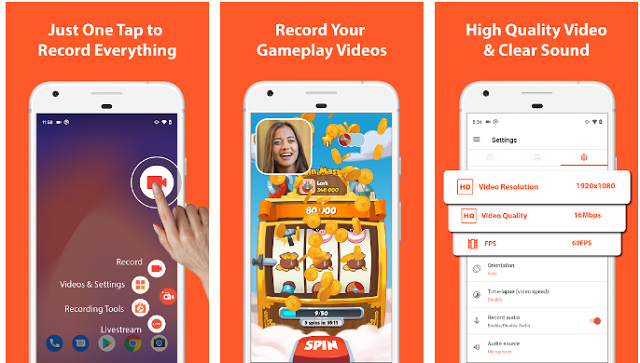 The AZ Screen Recorder is an amazing and easy to use app. It is simple, compact, affordable, and inexpensive. It has an overlay button that doesn’t mess with the information that is registered. For game streams or feedback, there’s even a front-facing camera. Plus, a small built-in video editor. You should shave out the pieces that don’t matter that way. It doesn’t require a source, of course, it has no watermarks, no time limits, and more. It costs $2.99 for the pro version, making it an accessible recording app to get.
Here’s how the AZ Screen Recorder should be used:
After downloading, run the app
The overlay will appear in the corner of your screen after running the app. The record hasn’t begun yet, so don’t worry.
Play a game that you would like to record
The same thing as explained earlier for Google Play Games. This method works for other recording apps as well.
Open the overlay and press the record button (the video camera button)
The overlay also has other attributes. These include live streaming on Facebook and Twitter, a shortcut to the configuration of the app, and a way to access your saved videos. The app is very useful and easy to use, and so it’s definitely worth installing.
Record Gameplay on Android using other Apps
There’s also a whole variety of apps like the AZ Screen Recorder that run. You need to pay for some of them, but there are also free ones on the Google Play Store. For Android smartphones, below are some of the popular ones:
1. MNML Screen Recorder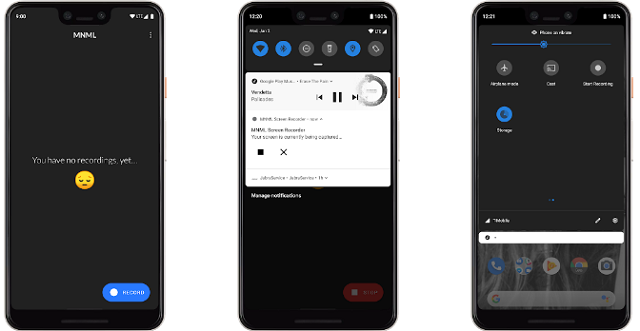
2. ScreenCam Screen Recorder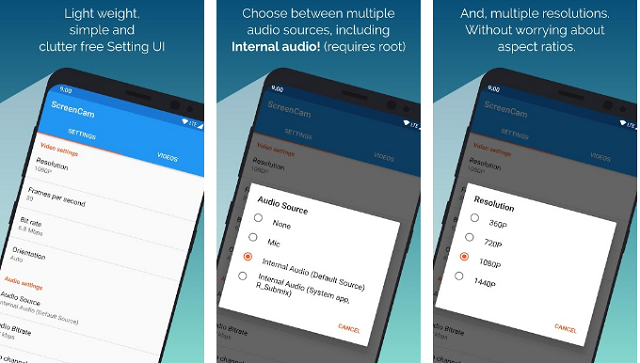
3. RecMe Free Screen Recorder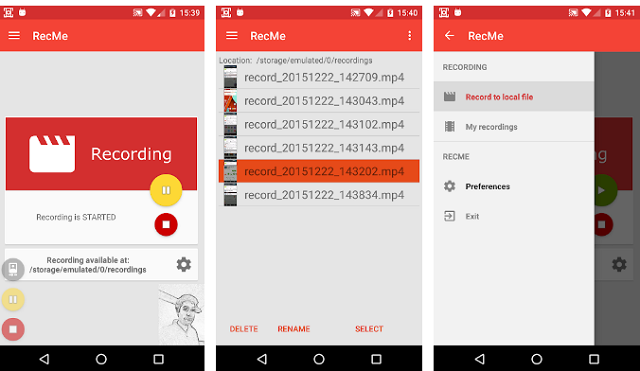
How to Record Gameplay on iOS Phones
On iOS, recording game playthroughs is as easy as on Android. The recording functionality is already pre-built on iOS, starting with iOS 11, unlike Android. Here’s how it can be achieved.
1.) Open the iPhone settings and check for the “Control Center”
This is where your iPhone’s adjustable settings are mounted.
2.) Tap “Customize Controls” and pick “Screen Recording”
This helps you to connect Screen Capturing (the white circle that is always on the screen of your iPhone) to the iPhone Control Panel. This is pretty handy since you only need to do one tap to capture your Gameplay immediately.
3.) Play and record your game.
Play the game you wish to record after adding the recording option. Then tap the Control Center and tap on the “Record” button. After this, you will be able to record your Gameplay for whatever game you wish to play.
How to record using iPhone/iPad Replaykit
 Replaykit, this time on iPhone / iPad games, is yet another built-in feature. This helps players in certain games to capture their Gameplay. This is how this should be done:
Find out if the game you wish to record is Replaykit-enabled
You will do this by checking for the game’s record button. It’s usually on the main menu. It’s in one of the corners sometimes. IPHONEFAQ has a list of compatible Replaykit games available here.
Tap the button and click on which type of recording you wish to get, and play
Then a question will appear, asking whether you want to record with a screen and a camera, or just a microphone. Pick which one you want, and then play the game as if you were playing as normal.
Choose if you want to edit or save the recording
This one will prompt any time a stage stops, unlike most recording applications. A question will then appear telling you if you want the video to be edited and posted or saved in your camera roll. The way the prompt is going to look differs from game to game.
Record Gameplay using other iOS Apps
There are also other Screen Capturing applications for iOS, aside from the options above. Any of them are as basic as the ones on Android phones and can be set up quickly. These are some of the applications on iOS for screen recording:
1. TechSmith Capture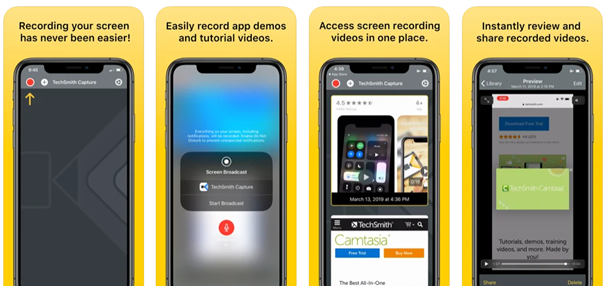
2. ScreenFlow
3. AirShou Screen Recorder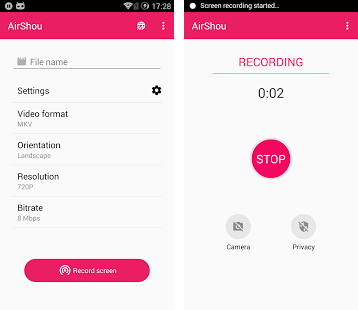
4. Vidyo Screen Recorder
How to Record Gameplay on Windows 10
A built-in feature for recording PC game videos is included in Windows 10. You can post gaming videos or just keep the video on your own PC and share it with your friends on YouTube or some other video-sharing platform.
You can do this with the “Game Bar,” which is part of the functionality provided by the Xbox app, “Game DVR.” For recording videos and taking screenshots, Windows 10 also provides customizable keyboard shortcuts.
Open the Game Bar
 Click Windows Key + G to open the Game Bar when playing a game. The game you’re playing will come up over it. Windows will inquire if you still want to open the game bar if you are pressing Windows Key + G because Windows feels you are not playing a game.
To see the game bar, you may need to play the PC game in window mode, so if you don’t see it, try setting the game to window mode.
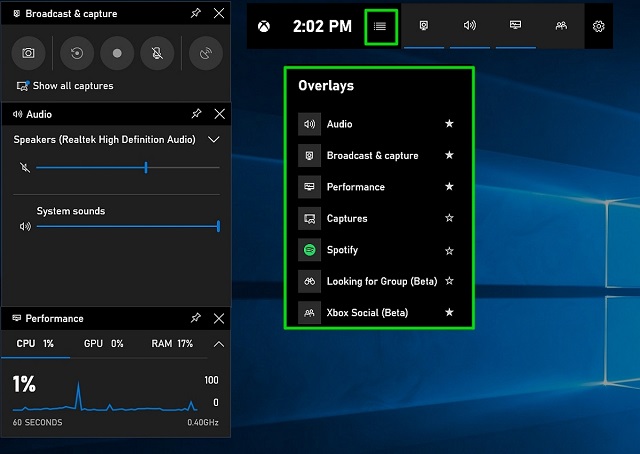
Game Bar includes mostly everything, such as icons for easily loading the Xbox app, monitoring background playback, taking a screenshot, recording live Gameplay, and accessing settings.
Record a Gameplay Video
 Open the Game Bar with Windows Key + G to record a video, and then press the red recording button. In the top-right corner of your game window, a timer can appear as it is being recorded.
To stop the window from recording, open the Game Bar again and press the red stop button.
With Windows Key + Alt + R, you can also start and end recordings. Click Windows Key + Alt + T if you’d like to cover or reveal the timer. In the Xbox app, these are the default keyboard shortcuts that you can modify.
Take a Game Screenshot
To take a snapshot easily, use the Game Bar to press the screenshot icon in the middle of the game bar. Or, to render a screenshot of the current game, press Windows Key + Alt + Print Button.
Find Your Screenshots and Videos
Windows stores all the images you film and the snapshots you take in the Videos/Captures folder of your user account. The recorded videos are saved as .mp4 files whereas screenshots are saved as .png files, each marked with the name of the game and the date and time they were taken by you.
You can also use the Xbox app to access them. To enter the Game DVR area, open the Xbox app from the Start menu and press the “Game DVR” button on the left-hand side of the app. Under “On this PC,” you can see a filtered list of all your screenshots and videos taken. From inside the Xbox app, you can view and replay them.
Configure DVR Settings for Game
You can manage the Game Bar and Game DVR settings through the Xbox app. Open the Xbox app, press the Configuration button, and then pick the customization of the Game DVR.
From here, you can totally disable the Game DVR, or set numerous keyboard shortcuts to open the game bar, film images, take screenshots, toggle the timer, and use the “Record That” function.
The options for choosing the folders where Windows 10 can save game clips and screenshots and choosing various video quality and resolution settings are also available. By default, when you record Gameplay, audio is saved; you can tell the Game Bar not to record audio or monitor the level of audio quality from here.
How to record Gameplay on PS4
Luckily, for just this type of thing, the PS4 has video recording capabilities built in.
On PS4, you can not only start recording for the Gameplay that is about to start, but the PS4 also records the last 15 minutes of gaming itself, so it’s easy to save a perfect moment that just happened.
Double-press the Share button on the controller while you are in a game and are about to start recording. Your PS4 will start recording automatically (a tiny flag will appear momentarily to let you know on the left side of the screen), and will continue to record for its normal recording time (which is 15 minutes, but you can adjust that), or until you manually stop recording.
Double-press the Share button a second time if you wish to stop recording until the automatic time span is over. In the Capture Gallery, the video clip will be automatically saved.
How to save the last 15 minutes of the Gameplay
If you haven’t been capturing something but want to save a video of something that just happened in a game, then you’re in luck. Like a TiVo that always saves in the background, the PS4 records the last 15 minutes of a game automatically just in case you know you want it.
Push the Share button momentarily to save the video. Select “Save Video Clip” in the Share Menu.
How to edit and share a recorded video on PS4
You should edit it down to the best aspect until you’ve shot the video, then share it on social media.
- Select the Capture Gallery from the PS4 Home screen.
- Find the video you want to post and highlight it.
- Press the Options button and then select “Trim” from the Options menu.
- You can adjust the start and end point of a video on the Trim tab. By default, you can only trim it at intervals of 10 seconds. Choose the menu that says “10 Second Cycles” if you want more detailed control of your video and choose a smaller amount, such as five seconds or even one second.
- To scroll to where you want the video to start, use the D-pad on the controller and then pick that spot. From the menu, select ‘Start Here.’
- Repeat the video ending process, and then select ‘Yes.’
- Choose to save the clip as a new video or whether you want to overwrite it.
- Hit the Upload button on the controller back in the Capture Gallery, pick which social media site to upload the video on, and follow the directions.